There are many custom settings available in Unattend.xml that can be used to add useful and practical touches to your Windows 7 image. We will be using the Microsoft-Windows-Shell-Setup_6.1.7601.17514_neutral configurations to add these custom settings to our Windows 7 image. I will be focusing on some of the recent customizations for my Windows 7 image applied during the OOBE configuration pass of Sysprep.
To add Microsoft-Windows-Shell-Setup to the OOBE configuration pass of the Unattend.xml, highlight Microsoft-Windows-Shell-Setup then Right Click > Select Add Setting to Pass 7 oobeSystem.
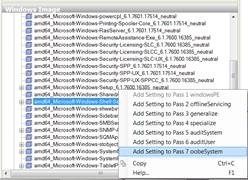
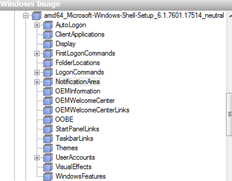
The Windows Image Manager lists the options of Microsoft-Windows-Shell-Setup for the oobeSystem configuration pass. You will notice that there are many image customizations that you can deploy out-of-the-box to your clients that will add really practical and kind of slick touches to Windows 7. Here are a few that I have used lately.
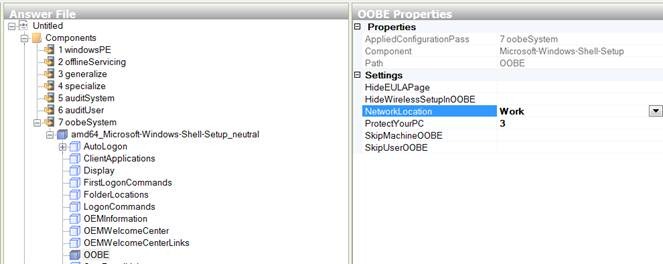
Set default Network location to “Work” and Disable Windows Update
Under the Answer file Component tree > Select OOBE > Under OOBE Properties use the NetworkLocation dropdown and select Work. This will set configure the Network settings to Work and not prompt the user at first log in.
Type 3 for ProtectYourPC. This setting will disable the default behavior to automatically go to Windows Update, (and since we always use a GPO or System Center for Microsoft updates we can set this without any worries).
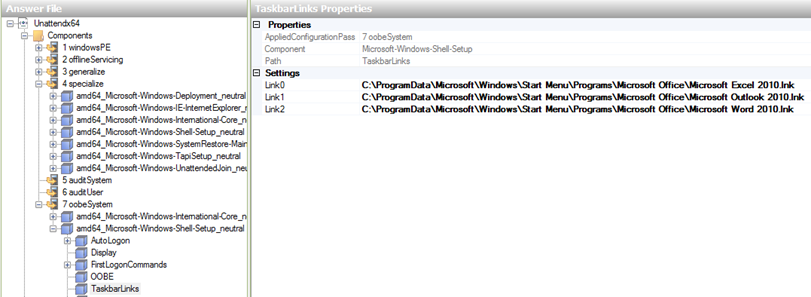
Set the Taskbar Links
If you want to pin a program to the Taskbar in your image set it in the Unattend.xml using the TaskbarLinks node. Windows 7 will allow you to set 3 programs in the Taskbar using the .LNK shortcuts in the ProgramData directory.
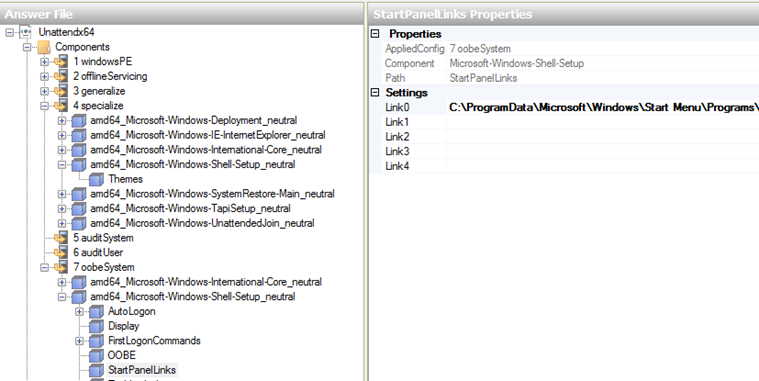
Set the StartPanel Links
If you want to pin a program to the Start Menu in your image set it in the Unattend.xml using the StartPanel Links node. Windows 7 will allow you to set 5 programs in the Start Panel using the .LNK shortcuts in the ProgramData directory.
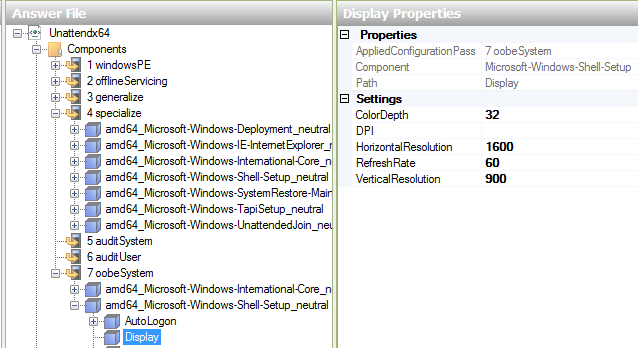
Display Settings
Click on Display and enter the Color Depth, Horizontal, Vertical and Refresh setting information.
“The postings on this site are my own and don’t necessarily represent my employer’s positions, strategies or opinions”


