I recently ran into an interesting issue when deploying Office 2016 ProPlus on Windows 7. I discovered that the OneDrive application installs under the user context, and not to the system like the rest of the suite does. This is not a big deal if you are using Windows 10, as OneDrive client is built in, but I was deploying to Windows 7 machines. So on Windows 7 only the user who ran the installer would have the OneDrive client installed. If I added a new profile to the machine it would also receive the OneDrive client. But it would not be available to any users with existing profiles on the machine. So to work around this, I created an Active Setup registry key and pointed it to the OneDriveSetup.exe that is installed along with the suite.
Active Setup is used to execute commands once per user during the login process. In this case I am using it to run the OneDriveSetup.exe silently for anyone who logs onto the machine, regardless of whether or not they had an existing profile.
Below is a copy of the PowerShell I used to create the registry entry. I also includes the command line version in case you are using a batch file.
$activeSetupPath = "HKLM:SOFTWAREMicrosoftActive SetupInstalled ComponentsOneDrive"
IF(!(Test-Path $activeSetupPath))
{
     New-Item -Path $activeSetupPath -Force | Out-Null
     New-ItemProperty -Path $activeSetupPath -Name "Version" -Value "1" -PropertyType String -Force | Out-Null
     New-ItemProperty -Path $activeSetupPath -Name "StubPath" -Value '"C:Program FilesMicrosoft OfficerootIntegrationOneDriveSetup.exe" /silent' -PropertyType String -Force | Out-Null
}
   ELSE {
     New-ItemProperty -Path $activeSetupPath -Name "Version" -Value "1" -PropertyType String -Force | Out-Null
     New-ItemProperty -Path $activeSetupPath -Name "StubPath" -Value '"C:Program FilesMicrosoft OfficerootIntegrationOneDriveSetup.exe" /silent' -PropertyType String -Force | Out-Null
}
reg add "HKEY_LOCAL_MACHINESOFTWAREMicrosoftActive SetupInstalled ComponentsOneDrive" /v "Version" /d "1" /t REG_SZ /f

reg add "HKEY_LOCAL_MACHINESOFTWAREMicrosoftActive SetupInstalled ComponentsOneDrive" /v "StubPath" /d "C:Program FilesMicrosoft OfficerootIntegrationOneDriveSetup.exe /silent" /f
For a little while now Microsoft has had an Update management solution which provides one stop visualization for Windows and Linux patch status. They recently added a very exciting feature of this solution which actually performs the patch management on your systems! For details on this solution including what it visualizes and how as well as how to use this to deploy patches see the article at: https://azure.microsoft.com/en-us/documentation/articles/oms-solution-update-management/
This blog post will deconstruct how OMS is actually performing the patch of these systems based upon information which is available in OMS and the attached Azure subscription.
At Ignite it was mentioned that you now must have an Azure subscription attached to your OMS workspace. That now makes a lot more sense as solutions such as the Update solution require an Azure subscription to function (this blog will explain why).
What does the update solution look like?
The top level view for the update management solution shows the high level status of patching for all Windows and Linux systems that OMS is getting data from.

Drilling in provides more details on the patch status:

The scheduling part of the Update solution is available on the right column:

How does the update solution deploy patches?
The update solution works exactly as it did prior to the addition of the ability to push patches – until you schedule the deployment of a patch in your environment. When you schedule a patch for deployment, the following steps occur (see the figure below):

- The first step that occurs is to create an automation account in the subscription which is associated with the workspace.
- In that workspace two runbooks are created:
- Patch-MicrosoftOMSComputer
- Patch-MicrosoftOMSComputers
- Patch-MicrosoftOMSComputers configures EVERY computer in your OMS workspace as an Azure Hybrid Runbook Worker.
- Patch-MicrosoftOMSComputer is run once for each computer that you target your Updates to.
- When the patching is complete the systems report back their updated patch status after the Update solution re-gathers their update information.
Let’s dig into these in more detail:
Creates an automation account:
An automation account is created which will be used for patching from this point forward in this workspace.
Create the two runbooks:
Two runbooks are created which appear to configure the Azure Hybrid Runbook Worker and perform the patching. What is really interesting is that each of these are “hidden runbooks” so you cannot see their content or make any changes to them (@Microsoft – having this type of functionality would be extremely helpful for organizations who would like to write their own automations as a business).


You can’t even resume, stop, suspend or of course you cannot view the source.

Patch-MicrosoftOMSComputers:
The two runbooks run one after the other, starting with “Patch- MicrosoftOMSComputers”.

This runbook provides very little diagnostic information as shown below:

Based upon what I have seen in my environments it looks like this script is the one which configures all servers in OMS as Azure Hybrid Runbook Workers (@Microsoft – second hint, this either needs to be documented extremely well or should only target the systems which you are choosing to patch). You can determine which systems are Hybrid Worker Groups by opening the Automation Account and then opening the Hybrid Worker Groups.

Details on this show all of the systems which are now Hybrid Runbook Workers in this workspace.

Patch-MicrosoftOMSComputer:
The Patch-MicrosoftOMSComputer runbook runs next – once for each system which is scheduled to be patched. This runbook provides detailed logging showing its status while patching the system. A full set of the stream information from a single round of patching is shown below.


Runbook Jobs, Parameters and Modules:
The job information is available just like with any other jobs in in Azure Automation – so it’s easy to see what succeeds or fails.

Their status appears in real time on the jobs pane so you can tell when they are running or completed.

The input parameters are consistent between the two runbooks. The five parameters are:
- WorkspaceID
- Duration
- ScheduleName
- ComputerIDList
- AdditionalOptions

Several Azure based modules are pre-loaded into the Azure Automation account as shown below.

Back to the Update solution:
After the patching is complete and the system has updated its patching the Update solution updates with the new patching information.

What do we see in OMS for logging?
The logging information for patching in OMS is very extensive. The example below shows how you can find updates based on their UpdateRunName, KBID, computer or title.

Additional details are available when you open up the table record as shown below.

What does the OS see?
From the Client/Server Operating System perspective patching occurs just like it does with any other tools (IE: items appear in the update history, the system reboots when required, etc).

Patch management status on the go!
Using OMS (even without patching via OMS) you can quickly see the state of your systems patching. The examples below show the patching status of systems from the Android version of the OMS mobile application.

Q&A:
Here’s a few items that I worked through while testing out this functionality:
- Does the Update solution replace Configuration Manager? At this point in time the answer is no. Configuration Manager provides a much more robust method for deploying patches. It additionally contains functionality such as Operation System Deployment (OSD), hardware and software inventory and more. Each of these functions is not something which OMS performs.
- Does this fit in with “Cattle vs. Pets”? If you are familiar with the Cattle vs. Pets analogy, the OMS patching appears to be focused on the large number of systems which do not require babysitting while patching (IE the Cattle).
- Can I run the hidden runbook for patching? No
- Can I run re-run previous runbook jobs? No
- Can I add my own runbooks into this Automation Account? Yes
- Can I use this Azure Automation account to run other automations? You can add and run your own runbooks in this Azure Automation account.
The new document library experience in SharePoint Online is simple, streamlined, and easy to use. Modern document libraries combine the power of SharePoint with OneDrive usability. They provide a consistent user experience across OneDrive, OneDrive for Business, and document library and hence provides a standard way of creating folders and uploading files. Modern document library combines the power of both OneDrive and document library. For modern document library, columns, views and content types still remain the key components which distinguish it from OneDrive
Key features of Modern Document Library:
- UI shared with OneDrive
- Thumbnail and List Views
- Contextual Commands
- Responsive UI (works with Mobile browsers)
- Usability
- View column resizing (double click column name to expand or click and drag)
- Easy schema updates (create new list scoped columns from UI)
- Show/hide/reorder existing columns from view in UI
- Save current view as public view (Manage View permission level enforced)
- Highlight key content using new pinning feature (Every View/Folder combinations has its own pinning)(Contributor permission enforced)
- Upload entire folder
- Support for file types – Photos, Adobe files, Photoshop files ( Photo viewing experience – similar to personal camera roll)
- Group By directly from UI (drag and drop items across groups and metadata will automatically inherit the group tags)
- Up to 2 levels of Group By available
- Link type added to library – add item as link (Thumbnail view shown)
- Copy and Move files and folders options available
- Details Pane
- Preview of document(Office Online Preview) and its associated properties
- Metadata Population
- Required Metadata Alerting
- Recent Activity (If folder selected then activity across entire folder will be shown in details pane)
- Displays who item is shared with
- Update metadata on the fly – support for all column types (people picker, managed metadata )
Command Bar

- Contextual Trim command bar replaces the traditional ribbon
- Any custom ribbon customizations made will appear on the new command bar.
Details Pane

- Preview of document(Office Online Preview) and its associated properties
- Metadata Population
- Required Metadata Alerting
- Recent Activity (If folder selected then activity across entire folder will be shown in details pane)
- Displays who item is shared with
- Update metadata on the fly – support for all column types (people picker, managed metadata )
Pin Files

- Modern document library provides pinning feature which enables featuring content and empowering users to highlight important documents.
- Select file and pin to top. Every view/folder combination has a unique pinned items set
- Minimum contribute rights needed to perform pinning of files
Quick schema updates

- View column resizing (double click column name to expand or click and drag)
- Easy schema updates (create new list scoped columns from UI)
- Save current view as public view (Manage View permission level enforced)
Edit View Columns

- Show/hide/reorder existing columns from view in UI
- Select columns to be shown in view
Link Content Type

- Link type added to library – add item as link (Thumbnail view shown)
- When adding link – recently viewed documents are shown
View Features

Update view settings from UI
- Order items
- Filter
- Group By
- Rename and move columns
- Show/Hide columns
- Add columns
Modern document libraries vs. Classic Document Libraries
- Class might still be right for organizations since all features from classic are not in modern yet
- Customizations in classic mode will not move over to modern
- Currently both modern and classic UI is supported and can be controlled at different levels (Lowest level setting wins)
- Tennant Switch (admin center)
- Sit collection and web level via PowerShell (enable hidden feature)
- Library level (Advanced Settings)
- Back to Classic link (single session)
Default tenant configuration is to auto-detect and modern UX is used by default
Certain features configured on the library will also cause it to default to classic mode (example :- Metadata filtering and navigation)
Features not (yet) in modern
- Ribbon
- Seldom used ribbon buttons like Popularity Trends, Tags & Notes, RDD feed etc.
- View Features
- Item totals
- Custom styles (example :- Basic Table)
- Navigation Features
- Tree View
- Metadata navigation and filtering (auto detect and fall back to classic)
- Managed Navigation
- Per-location views
- Customized navigation links on Publishing sites
- Field Types (Auto detects and falls back to classic)
- External data columns
- Geolocation columns
- Library Features
- Content Organizer
- Minimal Download Strategy
- Customizations (Auto detects and falls back to classic)
- JSLink on field and views
- Custom Actions
Required Metadata
- Files with no checked in version are only visible to uploader
- No “penalty” on leaving required fields blank
- “Missing metadata” and “files i need to take action on” views
- Bulk tagging after upload
Will Microsoft remove classic mode?
- Aspiration is clear, timeline is not
- Classic deprecation will not happen in 2017
- User Voice and usage data will be taken into consideration for modern mode
- Goal is to include core adoption blockers and issues in modern mode before deprecating the classic mode
- When and if usage data shows classic is no longer used, MSFT might pull the plug on the same
Upcoming Features for Modern Document Library
- Modern Document Library web part
- Modern Document Sets
- Bulk download
- Bulk Tagging
- Better Large List Management
- Custom field and list views (JSLink)
- Web Part Connections
Most likely over the last 5 years you have invested tens of thousands if not hundreds of thousands of dollars in the latest emerging marketing technologies (martech) – email marketing, social media, A/B testing, account based marketing, CRM, digital asset management, etc. – starting to sound familiar?
Here we are five years later and you now have an ecosystem of disparate systems that are all managing content of various types through separate interfaces. While your intentions were noble, trying to enable your marketers to have the latest and greatest tools to do their job, you have inadvertently created a system that is expensive, difficult to manage and difficult to report against in a cohesive manner.
The Chief Marketing Officer (CMO) Council did their annual report on marketing technology called Context, Commerce + Customer, in which they asked senior marketing executives about marketing technology trends. One of the questions I considered to be the most valuable has do with gaps in technology in the current MarTech stack.
Thinking of the marketing and commerce technologies you have already implemented, are there any gaps you will look to fill in the coming year? The top 5 answers were:

These are some pretty large gaps to fill and can easily add more money and complexity to an existing marketing technology stack that is already overly complicated and expensive. Assuming that you fall into one of these categories, this may be the point where you want to start taking a more holistic view of your marketing ecosystem. Really start evaluating the total cost of ownership of these separate systems compared against the features and functionality that are necessary to be a fantastic digital marketer. As I wrote about in my previous post, “Outdated technology can mean winning at digital marketing,” the maturity of some of the core systems like Sitecore, may provide an opportunity to rationalize redundant applications and provide a more streamlined approach to developing and deploying digital content and campaigns. So how do you get started? Let’s take a 5 step approach to hacking your martech stack and find the areas where you can find greater efficiencies and cost savings.
- Start by defining the ideal processes. You are a seasoned digital leader, you know what it takes to be exceptional in the digital marketing game, so start by identifying your ideal state. Think through things like content management and workflow, campaign development, personalization strategies, account based marketing, translation workflows, social media, analytics – don’t forget to include marketing activities that are already working in addition to the ones you want to add. Attempt to sketch a diagram of how all these processes might work together, what types of data could get shared between these processes. Ignore, for the time being, your existing technology stack and internal processes to currently do these activities. Again, focus on the ideal state and not the current state.
- Map your current environment to the ideal state. This is a great place to see where there are gaps in your technology stack as well as within your own processes for managing the workload that additional activities will bring. An easy way to visualize this is to create a high level feature matrix, the columns being a list of activities that you mapped out in your ideal state, and the rows would be the systems that currently exist in your stack. This will serve to inform the areas that need to be focused on and or added. Another consideration in this phase is to evaluate how much of a particular tool is currently being used. For example, in marketing automation, systems like Marketo and Oracle Eloqua are fantastic enterprise marketing tools; but if you only really use 40% of the feature set that they provide, are you better off utilizing a system that provides reduced functionality but at a better price point?
- Evaluate other technologies vs current stack This is where the real potential exists in the rationalization game. Prior to the maturity of technologies like Sitecore Experience Platform, much of the functionality that marketers desired, existed in separate systems. Solutions such as Optimizely for A/B or multivariate testing, and Constant Contact for email marketing, and Google or Omniture for analytics. The maturation of Sitecore Experience Platform includes all of this functionality in a single platform and experience. Not only do you get the benefits of efficiency in managing all of your content in one place, but you get the added value of all of that data from testing, personalization and email activities wrapped into a single view of your company’s customers and prospects.
- Design the “perfect” stack At this point in the process you should now know where your gaps in your stack exist, what options exist to fill those gaps, and where you may have redundancies. This is the point where the rubber meets the road and you begin to make the difficult decisions about what technologies to keep, what to get rid of and what to bring on new. The truth is that making decisions like these only seem difficult. I’ll talk more in a future post about the road bumps to technology upgrades, but the single biggest hurdle to upgrades is that too much consideration is given to the time and money spent on the existing marketing stack. That sunk cost got you to where you are today, and that’s great, but marketing innovation requires a constant investment in technology. As you review your stack matrix, remember to think about areas where you can have a single technology or application that covers multiple pieces of functionality. Again, I point back to the Sitecore example above, having personalization, multivariate testing, email marketing and integrated analytics all in a single system could be a huge cost savings if you can rationalize out several other applications in the process.
- Create your roadmap Now that you have your ideal stack defined, it’s time to get to planning on how to implement. First, document your stack and prioritize the roadmap based on budget, resources and business need / value. I won’t go into detail here since every stack is different and implementation of technologies varies from system to system. What I will mention is that you are better off using an agile methodology for getting your roadmap implemented. Scott Brinker, of chiefmartec.com, wrote a fantastic book, Hacking Marketing, all about utilizing the principles of agile software development for the purposes of marketing. In short, work on small, bite-size chunks of functionality instead of trying to boil the entire ocean at once. For instance, if you know you’re going to do a new implementation, you can start with your infrastructure setup, then move to base system installation, then integrations, UX, content mapping, etc. Each of these can be an iterative phase of the project instead of trying to do the entire thing in one fell swoop.
Finally, get started today. Your technology stack is only getting older and you are only falling more behind the longer you wait to start. If you think you don’t have time, then step back and ask yourself, “How much time and money would be saved if my marketing stack were up-to-date and efficient?”
Don’t lie – we’ve all played it. You’re sitting in company and client meetings, and you mentally twitch every time you hear a buzzword. You cringe when it’s used improperly. For me, one of those buzzwords is change management. Not organizational change management – that’s an entirely different ballgame. I’m talking about process and project change management.
Companies are finally jumping on the Change Management bandwagon. Unfortunately, many of them don’t know exactly what that means. Once they do catch on, they often think it is successful as long as they’re able to mark off boxes and logically advance to the next step. This is a dangerous way of thinking when it comes to change management.
According to Harvard Business School professor John Kotter, “70% of large-scale change programs didn’t meet their goals.” A TowersWatson study “found that only 25% of change management initiatives are successful over the long term.” For the investment made into projects, and even those with change management activities put in place, these are some scary statistics. (BTW – I found these stats from this Psychology Today article. Some fantastic info in here.)
All of that being said, there are a few things I see coming out of change management plans that are setting projects up for failure, but right now I’m going to focus on Communications.
First mistake – Not having a dedicated Internal Communications specialist to handle all communications needs of the project. By including an internal comms specialist on the project, they should be able to tap into what’s going on in the company outside of this project. They should be able to inform the project team of any potential conflicts. Things like, accounting has a company-wide email going out about EOM expenses, or HR has a new initiative rolling out around insurance changes, which could impact the system you’re about to be working on. Not having a holistic picture of what’s going on in the company can cripple a project from succeeding.
Second mistake – Not including this communicator in ALL (I twitch bolding, italicizing, and underlining, but hopefully you catch my drift on how important this is) project meetings. This also means having a comms representative present during the planning phases of the project. Internal Communications tend to be in touch with most departments of a company. Many larger companies have dedicated Communicators for the big groups, like HR, IT, Finance, and Marketing. With so many moving parts in projects AND companies, getting them all on the same page is vital and that means making sure you have everyone at the table.
Third mistake – Relying on a non-communicator to handle communications. Many companies don’t know where to put communications. They’re often under HR or Marketing. Many times, communications isn’t the only job duty. An employee also handles HR-related tasks or marketing-related tasks, THEN takes care of corporate communications. This harms projects in a few ways.
- You don’t have a communicator. Not just someone who has access to the distribution lists. You need a communicator who is trained to be able to speak to the project in lay-mans terms.
- Relying on someone who is HR or Marketing focused tend to bias towards their comfort zone. For instance, a marketing communicator may try to sell employees on the project, rather than focus on the “WIIFM” for employees. Telling them how great the new system will be, instead of telling them the actionable items and impact each employee will experience.
- Do I need to focus on having someone in IT trying to communicate about a project? Just kidding – love you IT folks! The work done in IT departments is imperative to day-to-day company function. This does not make IT Specialists communicators. To the companies who have hired communicators for your IT departments, here’s your virtual High Five! For those without one, I recommend it. Today, so many programs, projects and initiatives are coming out of IT and having a dedicated communicator can help not only get the word out properly as to what’s going on, but they can also give a helpful boost to some of your internal PR issues.
While change management might have been seen as an add on to projects before, digital disruption and disruptive technologies make change management a requirement. Projects should not be approved without a valid change management plan in place. Having a Change Management plan is vital to any and all projects. The key for that plan to be successful centers around a set internal communicator or team that can act as interpreters, communicators, cheerleaders, and as neutral 3rd parties.
Once you’ve decided that you need a marketing automation solution you have two choices: you can jump right in and starting setting it up and try to figure it out, or you can take a little time and plan the implementation. Most people will agree that taking some time is the right choice even though it is not always the way it happens in reality. So when you’re ready to buy a marketing automation solution, consider these five things before you purchase and deploy.
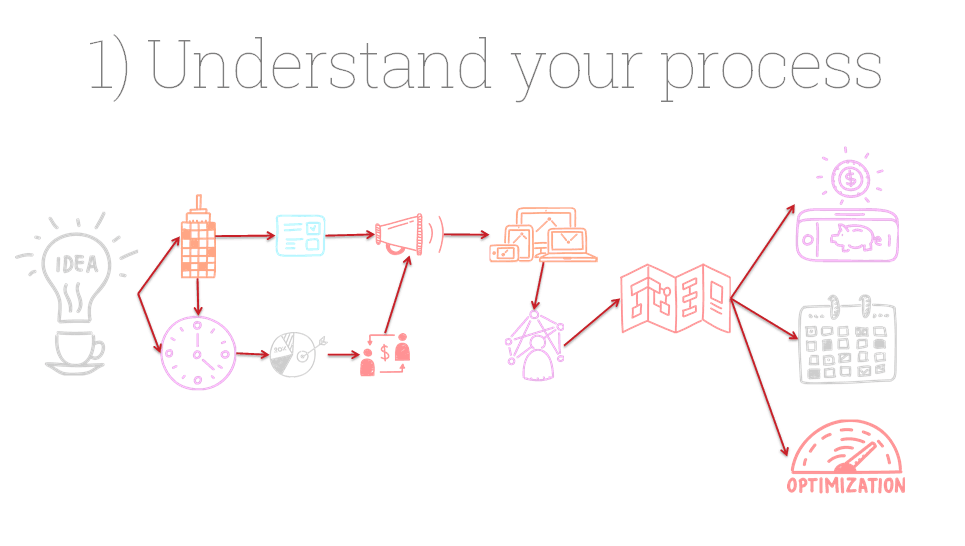
Start by understanding your current process for marketing to your customers as well as the pieces you would like to add once you have a solution in place. Marketing Automation will help automate a lot of steps, but if there are problems in your marketing process, then the solution will only amplify them by automating bad processes. Have an understanding of the customer journey, which includes the steps a customer goes through while interacting with your company on a purchase path. Understanding the potential touch points allows you to define what the customer expects at each step and stage. Does the customer need an article that helps them understand the size of the problem, or do they need help justifying the costs, or maybe they need to talk to a salesperson to get a demo of your offering? Understanding the steps allows you to determine the content or actions needed at each point. Then you’ll be able to build a full process that will help a prospect move down the purchase path with the right information at the right time so that they can make a decision.
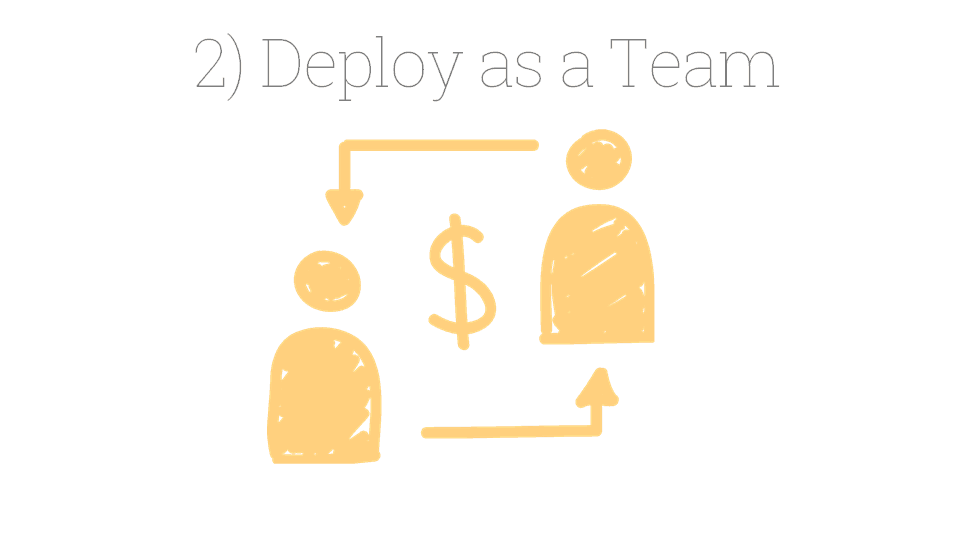
Deploying Marketing Automation cannot happen in a silo, as the results will not be ideal and the projects will often fail. Deploying a solution like this will require the cooperation of a variety of departments, most often including Marketing, Sales, and IT, but it can include other departments like BI or Decision Support, Operations, and others. To be an effective solution, marketing automation solutions often need to integrate with other solutions that are owned by IT or other departments. Make sure that data sources such as lead scoring models are based on data and insights from sales results. This will allow your automation process to be as close to reality as possible.

Marketing Automation can be complicated. There are a lot of moving parts to organize and manage when developing campaigns, but then you must apply all of those pieces to the technical solution that you purchased so that you can execute the campaign as you imagined. Hiring a partner with experience in marketing automation, or hiring a dedicated employee to own the marketing automation solution can greatly improve the results of any marketing automation program. Marketing departments are continually asked to do more with less, but this is an important step that you don’t want to skip. Having someone who understands the technical capabilities of your solution and also understands the art/science of marketing will prove invaluable as you begin to implement campaigns and get the most out of your system. An effective partner can help you short cut the process from starting to effectively running campaigns because they have experience and an understanding of the tools, theory, and execution.
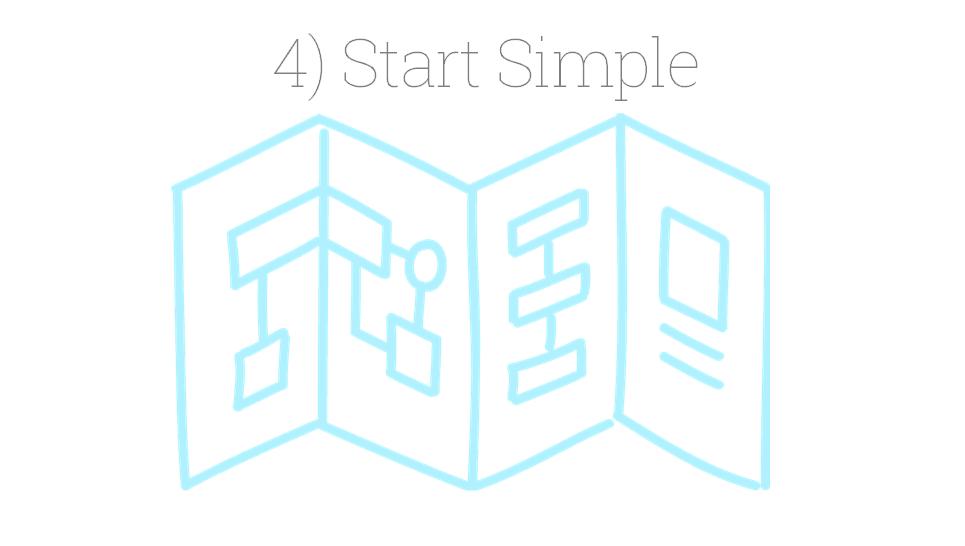
Start with a simple campaign and build from it. You don’t have to build every campaign that your company currently does into the solution to get started. Pick something that easily lends itself to marketing automation and start there. A great starting point is automating a campaign around a trade show or event. There are two benefits to starting with a campaign like this. One, the campaign is usually short in duration so that you can set it up and run it and see results in a short amount of time. Secondly, the content needed is usually pretty well defined. You will likely have a message before the event inviting registrants to visit your booth or attend your session. Then you might have a message during the event encouraging people to stop by and enter to win your giveaway or inviting them to take some other action. Then, you can have a message that recaps the event and have it scheduled to send three days after the event ends. Additionally, you can load the list of attendees who visited your booth so that they get a personalized email thanking them for stopping by and encouraging them to take the next steps with your company.
These are straightforward content pieces that can be easily created, and set up easily into an automated campaign. This will give you results quickly and allow you to get your feet wet without much risk.

The final step, and perhaps the most important, is designed to focus and motivate your team throughout the process of implementing marketing automation. I’ll be blunt, it’s not always the easiest process. Implementing the technology might be straightforward, but changing the behaviors of users who are learning the system, developing campaigns, creating content, and most importantly, understanding how to get the most value out of your system will take time and energy. When starting the process as a team, create a vision statement and a why definition. The vision is what you want to accomplish with the project and includes the metrics that you want to affect. You don’t have to define the actual numbers, but ideally you should know how you plan to measure success. The why is the reason you are doing this project, the motivation, and the outcome that you hope to see as a result. This can be aspirational, but make sure to be realistic. Having agreement from your team will help you focus and make progress as you move through the entire process.
By taking some time to plan your marketing automation implementation you can help ensure that your project will be successful by being better prepared to leverage the power that a marketing automation solution provides to you and your team.
Azure Resource Manager (ARM) Templates
Cloud Empowerment is a topic that should be important to anyone that owns or manages Azure cloud resources, or that creates products that run in an Azure-hosted environment. Automation is crucial to success in this new world order of cloud computing whether deploying a data center infrastructure, or a new application environment for development or production.
With that in mind, I want to introduce you to an important part of Microsoft’s Azure automation story; Azure Resource Manager (ARM) Templates. ARM Templates enable you to automate the creation and maintenance of the Azure environments which host your cloud-based applications. They are easy to use, for even the most basic Azure solution – perhaps for a single Web App and storage; But they are also powerful enough to provision large and complex systems that are hosted in Azure which may include an App Service Environment (ASE), Web Apps, Storage Accounts, a Service Bus, Event Hub, etc.
Recently I’ve been consulting on a project which is hosted in a complex Azure environment. Our team managed three such environments within a single subscription – one for Development, one for QA and a third for Staging. As part of this project, one of my responsibilities was to automate the creation and maintenance of these environments. My initial path was to use PowerShell to create and provision them. Fortunately, I was shown a better way. That’s where I began to learn about ARM Templates and that they are an excellent choice for Azure automation. As I now see it, here are some compelling advantages for using this technology.
- ARM Templates are supported in the recent versions of Visual Studio. They are manifested as Visual Studio projects that typically reside in a Visual Studio solution housing your application code. A benefit of this kind of solution structure is that the definition of the Azure environment remains consistent with the project code that it hosts. When the Visual Studio solution is managed within source control, the application code and the definition of its azure environment remain in lockstep as the overall solution evolves.
- ARM Templates are declarative – you define how you want your Azure environment to look. When the template is processed, its declaration is compared with the target Azure environment. Azure resources are only created/ removed/ configured when there are differences. This is an important aspect of Templates, particularly in the situations where provisioning an Azure resource can take hours, for example with an ASE. During automation, we only want to spend time updating an Azure environment when there is really something to update!
- Templates are parameterized so that the same template can be used to generate different environments based on the input parameter values. For example, in my case, I used the same template to create Dev, QA, and Staging environments for a subscription, differentiating them only via input parameters.
ARM Templates fit nicely into automated build/deploy scenarios. If done properly, one can be assured that the Azure environment has been appropriately provisioned prior to deploying code to the cloud. With this brief introduction describing the benefits of ARM Templates, check out additional posts for details and insight into creating, managing, and executing them.