You can add 3rd party applications like Yammer, Twitter, Skype, etc to be enabled for Single Sign-On using WAAD integrated through your on-premises Active Directory. Users can access these applications through the new Azure Access Panel.
Windows Azure AD supports two different modes for signing onto 3rd party applications:
- Federation using standard protocols
- Password-based single sign-on
Federation-based single sign-on
Configuring Federation-based single sign-on enables the users in your organization to be automatically signed in to a third-party SaaS application by Windows Azure AD using the user account information from Windows Azure AD. In this scenario, when you have already been logged into Windows Azure AD, and you want to access resources that are controlled by a third-party SaaS application, federation eliminates the need for a user to be re-authenticated. Federated SSO is available for end user browsers which support JavaScript and CSS.
In this release of WAAD, the following applications support Federation-based SSO:
Box
Citrix GoToMeeting
Google Apps
Salesforce
Workday
Office 365 Exchange Online and SharePoint Online
Password-based single sign-on
Configuring password-based single sign-on enables the users in your organization to be automatically signed in to a third-party SaaS application by Windows Azure AD using the user account information from the third-party SaaS application. When you enable this feature, Windows Azure AD collects and securely stores the user account information and the related password.
Password-based SSO relies on a browser extension to securely retrieve the application and user specific information from Windows Azure AD and apply it to the service. Most third-party SaaS applications that are supported by Windows Azure AD support this feature.
For password-based SSO, the end user’s browsers can be:
- IE 8, IE9 and IE10 on Windows 7 or later
- Chrome on Windows 7 or later or MacOS X or later
Testing out Yammer with Password-based single sign-on
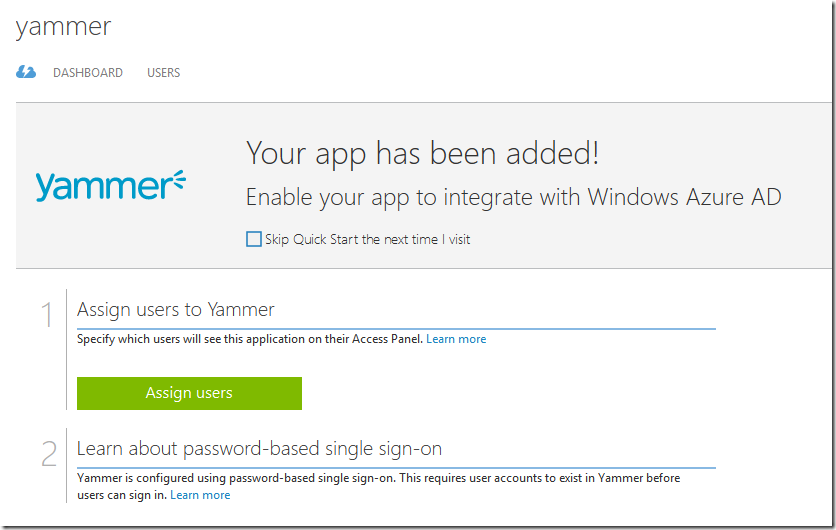
To try it out, I am going to add Yammer to the Active Directory applications. In this release of WAAD, Yammer only supports ‘Password-based single sign-on’ and not Federation-based SSO.
Note: If you already have ADFS on-premise, that is the recommended SSO integration for Yammer, as that is a better end-user experience than Password-based SSO. For information on configuring Yammer with your on-premise ADFS, see the Yammer SSO Implementation guide here: http://success.yammer.com/wp-content/uploads/2012/06/SSO-Implementation-Guide.pdf
The first step is to add Yammer to my Applications. So within Azure, click on the Active Directory icon from the left navigation pane

Then click on the Directory that you just added.
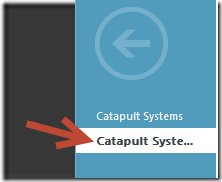
Then click on the Applications tab

Then click Add

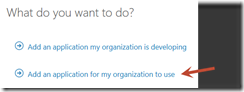
Select ‘Add an application for my organization to use’
Click on the Social Category and select Yammer

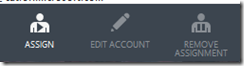
After adding Yammer, the next step is to assign which users will be assigned this application for SSO on their Access Panel.
As of this writing I am not aware of any powershell cmdlets for automating the assignment of users to applications. I checked the WAAD Powershell reference, which is where I would have expected to find those commands.
http://technet.microsoft.com/en-us/library/jj151815.aspx#BKMK_sso
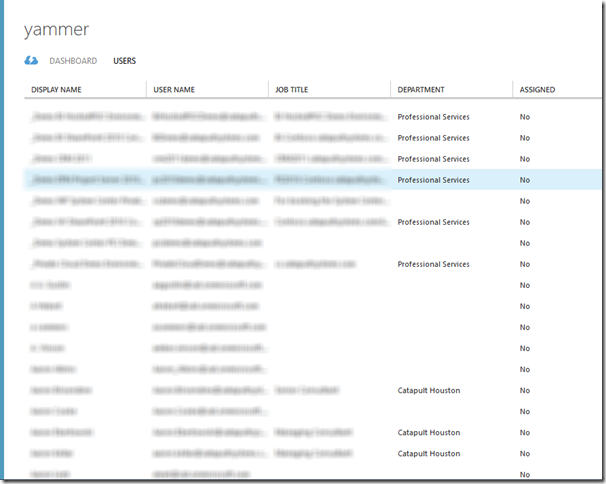
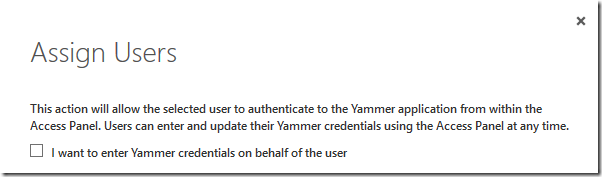
After highlighting a user(s) click the Assign button at the bottom of the screen
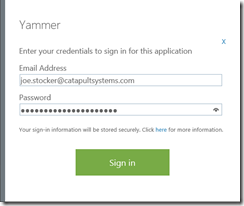
You will be prompted with an option of entering their Yammer credentials on their behalf. Otherwise the user will have the option of entering their password themselves later.
Note: The Access Panel is a web-based portal that allows an end user with an organizational account in Windows Azure Active Directory to view and launch cloud-based applications to which they have been granted access by the Windows Azure AD administrator. For more information about the Access Panel see http://technet.microsoft.com/en-us/library/dn308586.aspx
During the preview period for Access Panel, the following URL must be distributed to all users who will be signing into applications integrated with Windows Azure AD.
https://account.activedirectory.windowsazure.com/applications
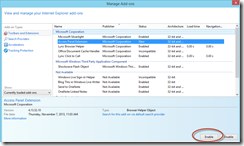
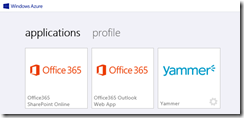
For example, for my user account, I have access to Exchange Online, SharePoint Online and Yammer. Therefore I see all three applications on my Access Panel.

I can then click on the settings icon in the bottom-right of Yammer to configure my current Yammer username and password.

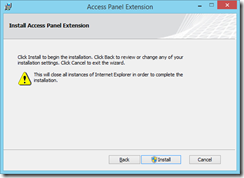
When clicking Update Credentials I am then prompted to install some software.
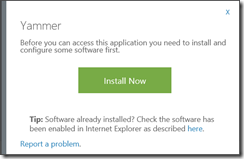
This will prompt the user to download ‘Access Panel Extension.msi’ (1.53MB)

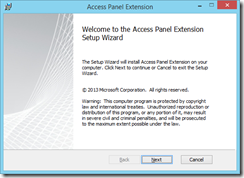
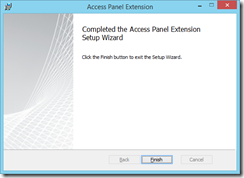
You are then brought to a Post Installation screen to insure you enable the add-on when prompted.
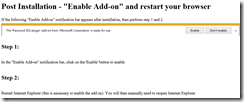
In my case, running Internet Explorer 11 on Windows 8.1, I had to manually enable the Add-on.
Now when I go back to step 1 to store my Yammer credentials, it allows me to do so.
Now when I click on the Yammer Icon, I am brought right into Yammer with no prompts.
It works!!
Note: If a user’s credentials change in a Password-based single sign-on application like Yammer, the user must update their credentials in the lower-right of the application tile, and select “update credentials” to re-enter the username and password for that application.
In my next post, I will configure Federation-based single sign-on with Google-Apps.
A colleague of mine, Michael Rinner, recently sent out the below information to our team. This is a great new feature that prevents the need for many Autodiscover Certs and configurations.
I would like to share something I learned. I am currently doing a Hybrid configuration between Exchange 2010 SP3 and Exchange Online with approximately 50 SMTP domains. Previously, the hybrid configuration required an autodiscover record for each domain and a SAN certificate with autodiscover for each domain. Exchange 2013 and Exchange 2010 SP3 RU1 or later introduced an autodiscover domain feature. The autodiscover domain feature tells Exchange to use the autodiscover settings of the primary smtp domain for all domains. http://technet.microsoft.com/en-us/magazine/dn249970.aspx
To make with work with the hybrid configuration wizard (HCW) do the following:
- Run the HCW with just the primary smtp domain and make sure it completes without any issues.
- Open the Exchange Management Shell from the hybrid server and run the following command.
- Set-hybridconfiguration –domains contoso.com, fabrikam.com, domaina.com, domainb.com autod:primarydomain.com (NOTE the autod) (Do not use quotes)
- Run the HCW again with all the domains populated.
- Then do a get-hybridconfiguration | fl and you should all the domains populated with the autod also.
I love using SQL Reporting Services because of all of the built-in report capabilities such as paging and viewing the report in a variety of formats like PDF and Excel. The one thing I haven’t liked is the fact that I have so much more flexibility when I build reports using .NET. I can get creative with my HTML format and layout.
I have discovered a nice trick in SSRS. You can configure your expressions to render using HTML formatting. This allows you to add HTML tags directly in your expressions, such as line breaks and bolding.
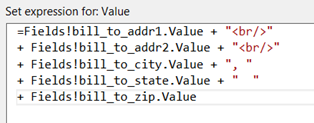
In this example I have several address-related fields and am using an expression to build the address. My expression looks like this:
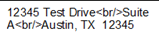
With the default configuration, my expression renders the HTML tags as text:
To modify the rendering property of your expression, first select the expression, and then right-click with your mouse and select “Placeholder Properties…”.
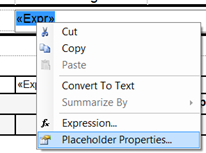
Under Markup Type, select “HTML – Interpret HTML tags as styles”.
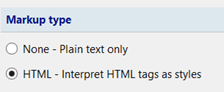
The same expression will now render like this:

The same concept applies for adding bold, italics, underlines, hyperlinks, etc.
For this series I will be using the CentOS 6.4 Linux distro. CentOS is based upon the Red Hat Enterprise architecture, so this article should be applicable to Red Hat and other Red Hat based distros. Some of the commands may or may not be applicable in other distros. For this reason, I have tried to explain what is happening in each, so you can apply the same steps in your environment.
*A note to people who may be new to Linux: most of the commands listed in this post will be case sensitive.
The four posts in this series are:
Part 1: Create VM – Creating the VM and Installing CentOS 6.4
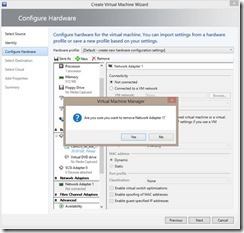
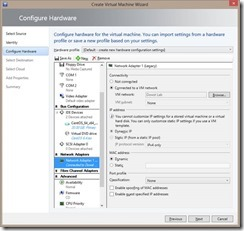
Part 2: Configure VM – Installing the Hyper-v Integration Services and Configuring the Network Adapter
Part 3: Prep VM – Prep the VM to Become a Template
Part 4: Create Template – Creating the VM Template in VMM
Part 1: Create VM – Creating the VM and Installing CentOS 6.4
The first thing we need to do in order to create the template is to create the VM and install CentOS.
Download the CentOS 6.4 iso. (http://www.centos.org/modules/tinycontent/index.php?id=30) This link contains a number of mirrors that contain the CentOS images. For this post I am using the CentOS-6.4-x86_64-bin-DVD1.iso that should be located in the folder /6.4/isos/x86_64/ of the mirror. Not all contain the full ISO so you may need to check a couple of the mirrors. Once you have downloaded the ISO, you are ready to begin.
Create a Virtual Machine (VM) with a Legacy Network Adapter and attach the CentOS install ISO to the DVD drive.
Start the VM and connect to it. (I find it easier to use Hyper-V manager as opposed to the VMM console for this portion.)
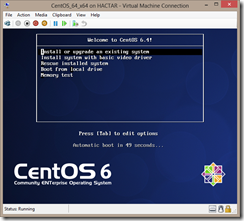
Select Install or Upgrade an Existing System
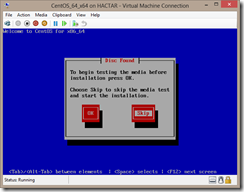
Choose whether or not to scan the install media.
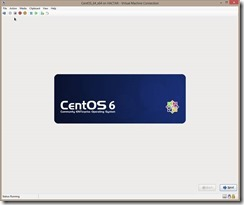
Next
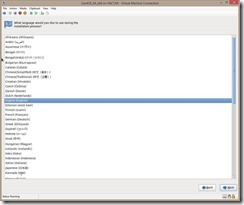
Choose your language
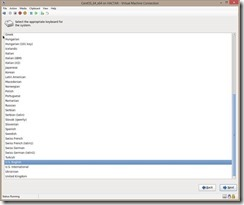
Choose keyboard layout
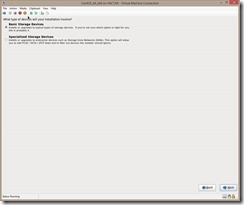
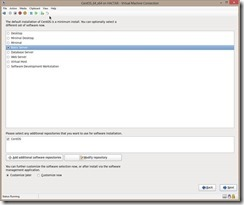
Select Basic Storage Device
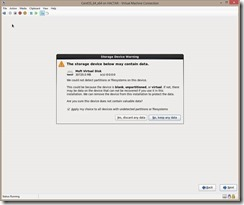
Yes, discard any data
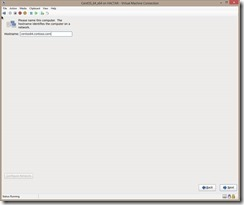
Enter the FQDN you want to use for the VM
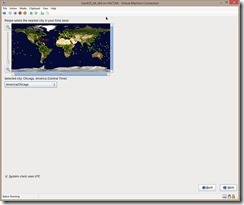
Select your time zone
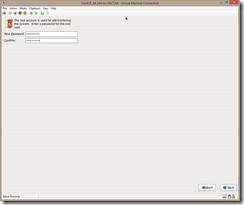
Enter a strong root password
Use All Space
Write change to disk

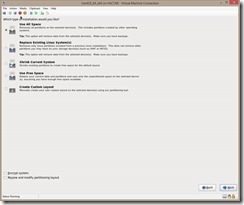
Select your install type (Since this is going to be a server template, I picked Basic Server)
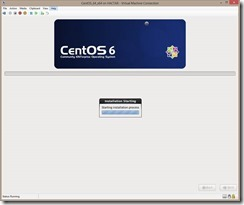
The install process will begin.
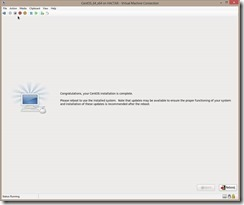
When the install finished click Reboot
Now that we have the OS installed, we are ready to install the Hyper-V Integration Services and configure the network adapters.